Showing posts with label crafts. Show all posts

Thursday, November 21, 2013

Mom, the Repair Woman

I anticipated many facets of motherhood and the many roles a mom fits into on a daily basis, but one job I never imagined I would participate in so often is that of Repair Woman.  Over the years, my kids have broken or had precious items fall apart on them quite consistently and they always come to me to see if it can be fixed.  Many times I have been able to repair broken items with my favorite tools: hot glue, Crazy glue, and needle & thread.  For the times when the repair is impossible, I put the item in a hidden cupboard and wait to get rid of it until it has been forgotten.  Recently, a bigger "oopsie" occurred than usual which resulted in Arianna's Bitty Baby having one of her legs detached (and she wasn't the one responsible for it, either).  This definitely was not an easy repair as it is quite difficult to put a needle through the hard plastic leg (by pressing it on a flat, hard surface each time), pull it through with pliers, thread it through the cloth part of the doll, and repeat, all the while trying to keep the loops semi-tight where the cloth and plastic meet.  Thankfully, Bitty did get her leg back and the great joy of my daughter after seeing her doll returned to a better state was worth the effort. 
The detached leg.

Needle technique, rough though it may be.

The finished product; not terribly pretty, but re-attached, nonetheless.

A happy girl.

Bitty's cast.

Friday, November 8, 2013

A Last Minute Halloween Costume

Sully and Mike Wazowski from Monsters U.


Some years back, we were given a really great Sully costume from Monsters Inc. and a Mike Wazowski costume, as well.  The Sully costume continued in stellar form, but unfortunately, the Mike costume's big plastic eye got cracked and then just went downhill from there.  Since Monster's University came out the summer, the girls wanted to revive the monsters costumes.  So, we needed a new Mikey costume and we also wanted to make Sully look like he was from Monsters U.

In order to accomplish our quick, costume update, we went to JoAnn Fabrics and bought 2 green t-shirts ($3 on sale, each), flannel, and a blue visor.  For Sully's fraternity shirt, I just freehanded the letters with a pencil and went over them with yellow fabric paint.  For Mike, I cut out each piece of flannel in its proper shape and then glued each piece on in order with fabric glue (which dries in 24 hrs.)  I used sparkly, silver fabric paint for Mike's retainer.  Then, I drew the MU with an eye on the blue visor and painted that on, too.  And, voila, we had Sully and Mike for Halloween.  I think they made pretty cute monsters!

Thursday, August 22, 2013

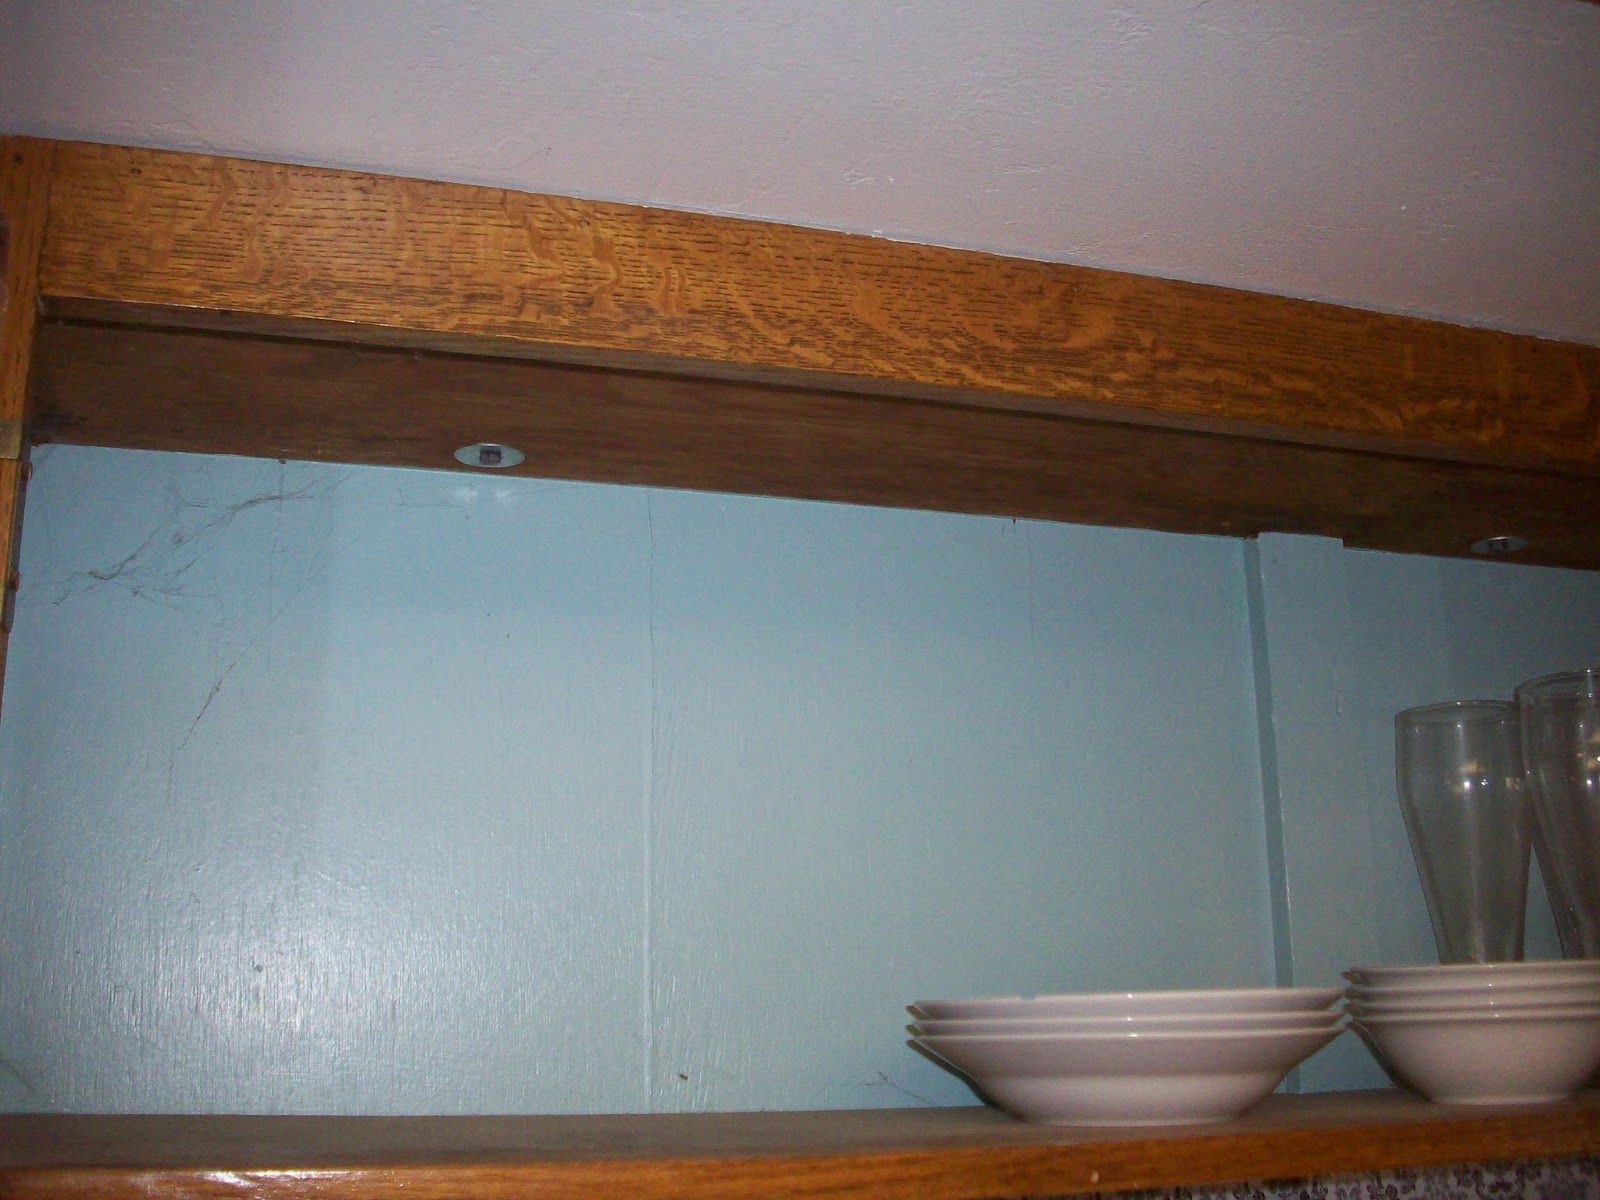
Quick Cabinet Re-do

When we bought this house two years ago, the kitchen was painted in white and a light turquoise color.  Don't get me wrong, I like turquoise, but it didn't do much for my country kitchen.  It was painted as an accent color inside the one large cupboard which is above the island/bar (which I would love to get rid of someday, but it is staying for now).  The cupboard has glass doors, so you can see inside while the doors are closed.  So, to give a tiny face-lift to the kitchen and cupboard, I decided to just find a pattern I had in mind in Contact paper and put it up over the turquoise paint.  I looked several places for a product like this and was having a hard time either finding what I wanted, or finding an affordable product that covers a lot of square footage.  So, I did what I should have done in the first place and shopped on Amazon.  I found a 2-roll pack of Laura Ashley contact paper that is nice and sticky on the back, comes with lines printed on the back for cutting, covers up to 30 square feet, and was $11.00 and change.  Here is my new look achieved on a budget. 

Before
 
After


This is also a good way to line the back of a bookshelf, line a shelf itself, or as a drawer liner (as it was intended). 

Sunday, May 5, 2013

May Photo A Day - 5/5/13

"Paper"


I won these darling cards at a giveway on my friend's blog:  whimspirationphoto .You can check out the Etsy store they came from at: out of the bag creations .


Saturday, February 9, 2013

No-sew fleece blankets

I really like this project because it so fun and easy and the results are quite nice.  I made a blanket like this for my daughter this Christmas from a No-Sew Fleece Blanket kit which really just includes the 2 pieces of coordinating fleece that you need.  More recently, I decided to make some mini fleece blankets for the puppies.  They will sleep with them for the next few weeks and then they will go with them to their new homes.  The familiar smell on the blanket will, hopefully, help comfort the puppies when they go with their new families.  I went to Jo-Ann fabrics where I knew the blizzard fleece was on sale and found some cute pet prints for the puppies blankets. 

Making the blankets is easy and can be done with any two pieces of fleece that are the same size.  The bolder, "right" side goes on the outside, so that the "wrong sides are facing in to each other and all the sides are matching up.  First, you need to cut a small square out of each corner.  Then, starting 1 side at a time (with both pieces of fleece still together), you cut strips about an inch or 1 1/2 inches wide and about 2 to 3 inches deep, depending on how big you want the ties to be.  Then, you tie a square knot in each matching set of ties all the way around the blanket until you are finished.  Then, the blanket can be washed, dried, and used.  There are so many different patterns of fleece available that you can really have fun with this project and make it special all sorts of people or occasions. 

Buddy snoozing.


Jake with the new blankies.

Friday, January 25, 2013

Wheeler Works

My sister-in-law, Sarah, has a lot of experience in fashion and design and is very talented.  Recently she started up her own business and is selling her products on Etsy.  She is creating beautiful scarves that are luxurious and one-of-a kind.  Take a look at her shop here.


This is just one of her beautiful creations!

Sunday, December 16, 2012

Hanging Christmas Cards

I'm always propping up Christmas cards around the house at this time of  year trying to display them in some fashion, but this year I was looking for a new way to do this.  I think I saw a picture of this idea somewhere else, but I can't remember where exactly.  So, I just did my own take on it. 


I traced the letters on pieces of white paper and had each of the three oldest girls decorate one of the letters the way that they wanted to.  Then, I hot glued the pre-measured ribbon onto the bottom back of each letter.  When the glue was dry, I used masking tape to stick the letters to the wall and to secure the bottom of the ribbon to the wall, as well.  I tried using double sided picture sticker mounts to tape the cards to the ribbon, but that didn't work out so well.  So, plan B of hot gluing them to the ribbon turned out to be the solution.  I think it turned out pretty well for a quick, little Christmas project. 

Monday, November 5, 2012

Painted Pumpkins

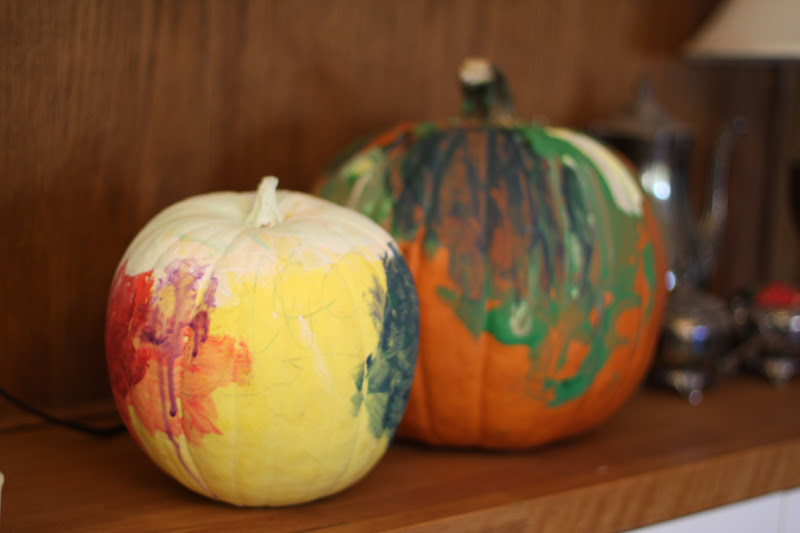
Carving jack o' lanterns seems like a fun idea if: (1) you have the right tools, (2) you have a chunk of time to dedicate to the carving, and (3) if your children are old enough to do some or, better, most of the carving themselves.  As we don't fit into any of these categories, I thought it would be nice to let the girls paint them instead.  Also, this preserves the pumpkin flesh inside for when I want to actually cook it up and use it (the paint is washable, so I'll have to wash it off before baking :-).

Here are the girls working on their creations.

Scotch tape make it easy.


And here are the finished creations.

On the left, Livia's pumpkin (4 years old). On the right, Dakota's toddler pumpkin (2 years old).

The older girls' pumpkins.

Arianna's candy corn pumpkin.

Selah's bat.

Isabella's modern pumpkin interpretation made using strips of masking tape removed after painting.

Friday, September 28, 2012

Shutterfly Update - Two Thumbs Down to Their Customer Service

Well, I don't want to waste much more time on this topic, but since I put up the previous post, I will give a brief update on what transpired since.  I find it exceedingly frustrating to be offered a "deal" and then find out that the conditions to fulfill that so called "deal" are so frustrating that it turns out to not be worth my time or effort.  Such was the case with this one.  After I used the link from Shutterly to embed the book I made into my blog, I went back looking for the e-mail address that I had seen so that I could send in the link to my blog post.  After talking with a customer service representative from Shutterfly online who had no idea what I was talking about, I ended up calling their customer service phone number.  Can I just say, "complete nightmare!"?  I was literally on hold for 45 minutes just to get an actual human being on the line (don't worry, I didn't waste any time; I just put the cell on speakerphone and went about my usual business while waiting) and then when I finally did get a response, the lady put me back on hold for another 15 minutes so that she could find a manager to ask about my inquiry.  And the not-so-amazing answer to all of this is that the deal was actually through Blogger (or so they say) and was just being offered with Shutterfly on their website after you make a purchase.  At that point, I was so fed up by having even wasted my time to not be helped, that I decided the $10 credit I could receive wasn't worth the effort and I'd stop wasting anymore time on it.  It still irks me, though, that companies will offer "deals" to customers or collaborate with other companies on these "deals" but still have no idea of what it actually is and fail to inform their customer service representatives about it.  Based on this experience, I will need to find some pretty good coupons online before I purchase another item from them again because any product could arrive at my house defective and I wouldn't want to encounter that same customer service situation that I've already experienced.  Snapfish, as I mentioned before, won't combine coupons, but in all my dealings with them and various requests for them to replace items that did not come out with good printing quality, they have always responded with wonderful manners and the attitude that the customers is right - I like that!

Saturday, September 22, 2012

A Photo Book Gift made on Shutterfly


Shutterfly offers exclusive layouts and designs so you can make your book just the way you want.

Here's what I made for my hubby for his birthday.  I took some pics that he took this summer when we were out on a hike and put them together in a themed book.  Hopefully, he doesn't see it on here and take a peek.  I can get a $10 credit at Shutterfly, though, for putting this up on my blog so I thought that I would give it a go.   I usually use Snapfish, but I had a $20 credit on my account at Shutterfly, so I decided to try them out this time around.  Something that was different and really cool is that they let me combine my account credit and a coupon code from their website in the same order making it a really great discount.  I've tried that on numerous occasions on Snapfish and it never works; you can use one coupon code or promotion per order.  I hope this looks as good when I receive it as it looks on the computer!  

Tuesday, May 29, 2012

A Sick Day Sewing Project

Selah, #2, has had her share of illness and sick days this year.  We have had quite a few days home together during this school year and she is always dreaming up new things to do to stay busy once she is feeling well enough and between respiratory therapy sessions.  On the day that Livia and I were sewing her dress, Selah asked if we could make a dress for her favorite doll, Sarah.  We used scraps of fabric and beads and this is what we came up with.


Wednesday, May 23, 2012

A Super, Simple Sewing Project

We have been contending with the chicken pox now for a couple of weeks, but this weekend it hit all the remaining girls and has since been occupying some of our time.  Thankfully, my oldest two are in school today and my kindergartner seems to be rapidly on the mend.  My girls all had the varicella vaccine, so this whole episode of chicken pox has been, thankfully, rather mild.

A few weeks back, Livia, #4, told me that she would like to make a pretty necklace.  This is the girl that wants pretty dresses, pretty jewelry, shows off her lovely dance moves to the family nearly every day, and gives out the sweetest, darling compliments to us, unsolicited.  I had a nice double-stranded chain that my Mom had given to me and so we trotted off to JoAnn Fabrics to find something pretty to attach to the chain.  We settled on a pack of clearance hearts, a bargain pack of colorful flowers, and jump rings for easy attachment.  Of course, while walking around, Livia spotted the fabric and was oohing aahing over all the beautiful colors and textures of the fabrics.  I saw that a fabric I had used in the past that is pre-made for dresses and skirts was on sale, so I let #4 pick out the one that she wanted and we bought grosgrain ribbon to match as straps.  All this requires on the sewing maching is sewing a few a straight stitches and zigzagging the edges, and "voila", you have a cute dress that was easy as pie to make.  I'm not very skilled on the sewing machine, so this project was right up my ally.  Here is a picture of our finished results.
It's hard to see but Snoopy and Woodstock are on the bottom of the fabric.

Friday, April 20, 2012

Room Make Over: A Fashion Fairytale


When we moved to this house a little over a year ago, we had to decide where the girls' room/s would be.  This house is a little bigger square-footage-wise than our last place, but instead of 4 bedrooms, we now have 3.  One of the 3 is downstairs and with younger children, inevitably they wake up in the middle of the night, need help, sleepwalk, get sick at night, etc.; so we didn't want to put any of them downstairs for now.  Upstairs has 2 bedrooms and 1 of the bathrooms and one of the bedrooms is double the size of the other.  We decided to make the larger room the girls' dorm and put them all in it and give ourselves the smaller room.  This has worked out really well and the girls enjoy having each other around and hanging out together.  This did give me a challenge when decorating, though.  I didn't want it to be decorated as a nursery (eventhough our youngest just turned 2) because the older girls have already outgrown the "babyish" themes, as they would say.  I also wanted whatever we chose to appeal to the younger girls (5, 3, 2 years old) as well as the older girls (7 and 8).  Then, I got an idea.


On Dakota's birthday, I gave her a Barbie movie because she likes all of her sisters' Barbie movies so much.  The movie she received is called, "Barbie: A Fashion Fairytale", and in it Barbie goes to Paris to visit her aunt whose fashion house is beginning to fail and the story is about the restoration of her business.  Then, I was on Amazon looking for vinyl decals for the girls' walls and found several that either had to do with Paris and/or fashion from different merchants.  So, I ordered them and got to work putting them up.  This is an easy way to decorate that isn't very expensive, looks nice, and can be removed and changed later on.  Here are our results; see what you think!

Monday, April 16, 2012

A Color Infusion

While my hubby was away last week on a missions trip to Thailand with a group from his school, the girls and I tackled their bedroom (all 5 of them are in the same room).  We pulled out furniture, swept up piles of dust, through away garbage and random items, reorganized drawers, and washed the walls with warm, soapy water (the fun part of the cleaning :-).  With only a day and a half left until Papi (their Daddy) got home, we gave their room a mini color infusion by painting a bright pink on 2 sections of wall - enough to not make the whole room dark, but a nice change nonetheless.  Here is the finished paint job.  Stay tuned for the rest of the room make-over. 

I was pretty pleased with the results considering the fact that I couldn't find the painting tape and did the trim work with a brush, sponge brush, and a wet rag for clean-up.  I really liked the Glidden 2-in-1 paint that has the primer right in it; it sure made it a quicker paint job.

Monday, April 9, 2012

Gift Bow Making

Since #5's birthday was just this week, I thought I would include a fun bow making idea shown to me by a friend that likes to craft.  Here are the links to the "howaboutorange" blog from which this idea comes.  It is an easy way to recycle magazine pages, or you can use wrapping paper/scrapbooking paper, as well. 

http://howaboutorange.blogspot.com/2009/10/make-gift-bow-from-magazine-page.html
http://www.howaboutorange.blogspot.com/search/label/recycled

Here is an example of how I made a gift bow with two contrasting wrapping papers.

Thursday, February 16, 2012

More Valentine Love

This was a darling book that my first-grader made for us in her class.  Her teacher is wonderful and has them work on really neat crafts throughout the year, not to mention keeping them challenged academically.


It says "Mom" but it is hard to see.

Her class just got ipod touches, so that is obviously a big hit.

A horse, and an ipod (I think).

The bottom item is 7-11 because she likes slushies.


Umbrellas on the beach.

Monday, January 9, 2012

My Knitting/Crocheting Bug

I've enjoyed knitting and crocheting off and on over the years; mind you, I don't really do patterns or anything complicated, but I enjoy making simple projects, nonetheless.  I made each of my girls a baby blanket when I was pregnant with them and they call their blankets, "special blankies".  It's special watching them love and use their blankets so much!  I've been wanting to make beanies, but just hadn't given it a shot.  Talking with a friend recently, she suggested I try winging it on making a beanie or two since I am not the best at following patterns - I guess I'm just a little more free-spirited in my yarn projects.  So, over the Christmas break in Oregon, I brought along a sewing bag of supplies and tried my hand at a few beanies for the kids.  I had a lot of fun, am learning along the way, and the kids are pleased with the results, too!  So, it's a win-win situation all the way around.
She loves striking a pose!

I used the same yarn from her "special" blankie that she loves so much.

This one turned out to be a little more of a slouchy beanie on top.

Pretty cute!
The other beanie I made was for my oldest with wool and I lined it with fleece because the wool is itchy.  We went to Walmart and found some cute buttons - she chose one that says "Be Happy" and is affixed to her hat.  Now, I'm working on matching scarfs.  Fun stuff!